2 in 1 sock KAL part 4: the heel part 3: gusset
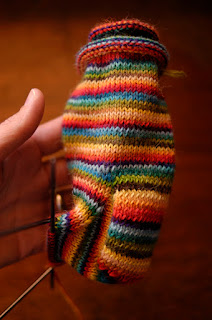
Finished gusset.
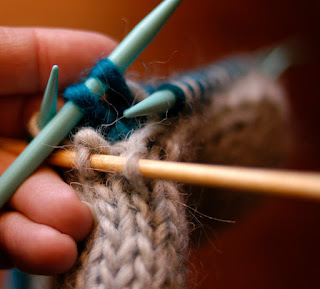
This you will do in a similar way to transferring stitches when you first cast on. Alternate picking up for the outer & inner sock.
When you get to the end, knit across the foot sts and pu in the same way along the 2nd heel-flap edge. End by knitting the 2nd half of the heel stitches.
If your needles aren't arranged how this above image shows rearrange your stitches now with Needle 1 having half of the heel stitches and 1 heel-flap edge (bottom needle in photo); Needle 2 the foot stitches (vertical needle); Needle 3 the other heel-flap stitches and the other half of the heel (top needle). After picking up the heel stitches knit 1 round knitting through the back of the heel flap stitches.
Notice how the stitches are twisted.
The next round will begin the decrease rounds that shape the sock. I like to decrease every round but you can decrease every 2nd or 3rd round to get back to the amount of stitches you started with. The decreases will always be at the end of Needle 1 and the beginning of Needle 3.
For Needle 1 knit to 3sts from the end, rearrange the stitches like you did for turning the heel, K2tog for both the outer & inner sock, K1 in the usual way. Knit across Needle 2.
For Needle 3, K1 in the usual way, then rearrange the stitches so you can SSK for both socks and K to the end.
Again continue working these decreases until you are back to the number you started with. For me with the sample shown 24sts each sock and for the Misti Sock 52sts each sock.
Once you've decreased to the proper amount of stitches knit to about 2" shy of the final length of your foot.
Next post we'll decrease for the toe. Almost there!


OMG - yyou are a genius! Course I knew that already. This is brilliant. I can't wait to knit a new pair of ski socks like this!
ReplyDeleteThis is so cool! I just love that you're doing this. What a great warm weather project this is.
ReplyDelete