the Eastsider

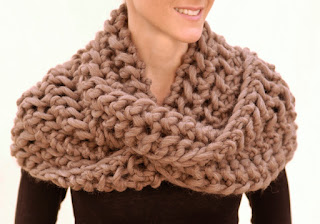
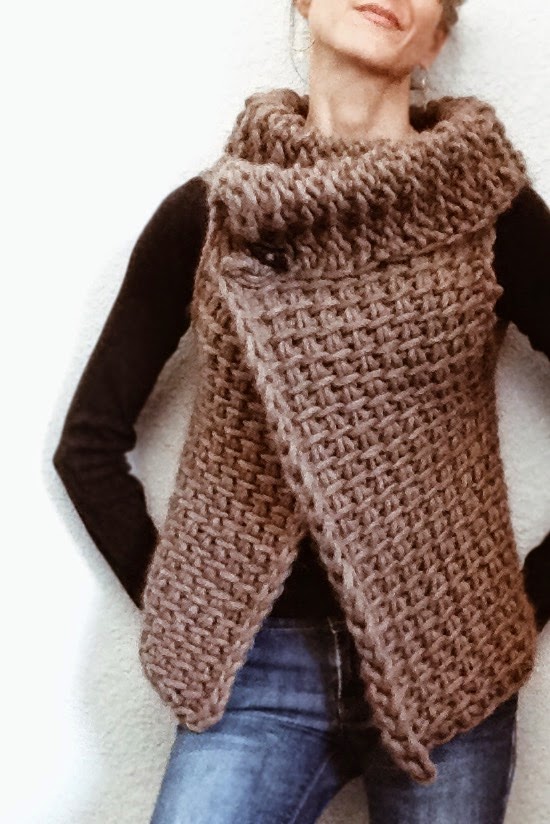
I know I said my next post would be a knit cowl but I just couldn't put down my S hook and Tunisian crochet is a little bit of knitting???... anyway, I'm working on a crochet kimono that uses black and white Magnum and my leftovers were talking to me. I love black and white together and knew with Tunisian crochet it would create a statement piece without a lot of effort or time, probably a quarter of the time it's taking me to post it LOL!
The Tunisian stitch in this pattern is the Tunisian Plain Stitch. The first 2 rows are worked as for Tunisian Simple but from there instead of going through the vertical bars like you do with the Simple Stitch you go through the space below the chain of the previous row... confused? I've added photos to help and if you need a reminder on how to work the first 2 rows of Simple look back to my tutorial here.
Right Side


Wrong Side


the Eastsider
Materials:
Tunisian Crochet Hook size S (19mm)
120yds (250grams) total of a chunky yarn like Magnum by Cascade. If using 2 colors @60yds each color (125grams each color)
Darning Needle for finishing
Gauge: @1st per inch
Finished measurements: before sewing together 28" x 15" 71cm x 38cm
Main Color (MC): Black
Contrasting Color (CC): White
Tunisian Simple Stitch
Make a chain the number of stitches required.
Row 1: Insert hook into the 2nd ch from hook, * draw through a loop, insert hook into next st, repeat from * leaving all loops on the hook. DO NOT turn work.
Row 2: (working back from left to right) draw yarn through a loop * draw through 2 loops, repeat from * to end of row. 1 loop on hook
Tunisian Plain Stitch
Work 2 rows Tunisian Simple.
Row 1: Insert hook under the horizontal bar formed by Row 2, draw through a loop.
Row 2: As Row 2 of Tunisian Simple.
Start:
With MC Chain 18 and work Row 1 of Tunisian Simple. 18 loops on hook.
If you can pull the loop through the bump on the back of the chain, this makes for a more finished edge. Again check out my tutorial on Tunisian Crochet to see photos of this.
Now work back, do not turn the work.
Work a Row 2 of Tunisian Simple
A note on changing colors: I found I got the best result for a clean edge when changing colors by letting the yarn I wasn't using sit off to my right side. I didn't try to twist the yarn or cross it over in any way, then when I went to use it again it crossed in a way that looks neat and clean.
Change to CC and pull a loop through the space below the horizontal bar of the previous row.

These photos show after I worked a couple of rows but you can see the space you pull the loops through. Not the vertical bars like in Tunisian Simple, but just below the horizontal bar.
Pull loops up through each space to the end. 18 loops on the hook.
Work Row 2 of Tunisian Simple (you will always work back as in Row 2 of Tunisian Simple).
Switch back to MC and begin next row.
A couple of notes before we continue. As I said in my other Tunisian Crochet tutorial, I've read other tutorials or instructions that have you chain 1 at the beginning of a Row 1 but for me doing that made a messy edge so I skip that step.
Secondly, read through the captions with the photos below before you start. In a MC row I have you pick up 19 loops; in a CC row only 18, when you read through (with the photos) this will make sense.
Continue working Row 1 & Row 2 of Tunisian Plain (changing colors at the beginning of each row) until cowl measures 28" (71cm)
When desired length is reached end with a Row 1 in the CC, 18 loops on the hook. Fold piece in half with the Right Sides facing so the starting edge meets the loops on the hook and join by working a row of slip stitch to the end. Finish off the last loop, weave in ends, wear and enjoy!
These next 4 photos show where to insert the hook at the beginning of the row for the MC and the CC.


Note: when switching colors you will go into a different space at the beginning of each row. As you get more rows you will see the vertical stripes made with the 2 colors and if you follow the stripes you will be working in the correct space. For a MC row: Insert your hook into the space to the left of the edge stitch as in the above photos.
Notice in the next set of photos the space to insert your hook to pull the first CC loop is to the left of the first MC vertical bar of the previous row. See the continuity of the white stripe, keep that in mind as you work that if there is a break in that vertical color line then you've gone into the wrong space.


These 3 photos show where to insert the hook at the end of the row for the MC and the CC. 

The last stitch with the CC should look like this. Notice the 2 vertical bars of the MC on the left edge.


The last stitch of the MC row is made by going between the vertical bars of the last stitch of the previous CC row (top photo). The bottom photo shows how the stitch should look after completing. This last stitch on the MC row will add a stitch making the stitch count for a MC row 19.
That is amazing!!! I love it!!! Thanks for the free patterns AND the tutorials!!!
ReplyDeleteI love your paid patterns too. I've made several of them and am always impressed with how well written they are. Keep up your beautiful creative work!!!
Thank you for your kind words!!! Happy Holidays to you! :) Karen
Delete